Showing posts with label wedding. Show all posts

Thursday, 21 July 2011

Delicious Details - Heart Place Cards

Hearts are, in many ways, the quintessential wedding motif and there are so many ways of including them in your day. They don't have to take over, they don't have to be the overwhelming feature of the day but you can easily sneak them in, especially at points when you need a little something.

And place cards can sometimes be the perfect spot for a bit of heart based inspiration and also a great touch of wedding DIY. Here are some lovely lovey-dovey ideas for things you can make, things you can do and things you can easily and cheaply put together to stamp some big lurve on your wedding day. So, without further ado, here we go with the ideas...

Above - I really like these place card holders - they'll add some height to the table and if you've got high table centres, they won't get lost underneath them. Two wire hearts on stands can have place cards slipped between them and if you're handy with the pliers, you can, with a little practice, easily bend the wire into shape yourself. Image - Belier

Above - a more traditional style place card with a sweet heart and stitched look. The backing card can be cut with edging scissors and then the name card is stuck on top. You can create the stitched look with a marker pen and the heart can be made some either wood or felt or really anything you like. Image - Folksy

Above - now I've professed my love for origami before and this folded heart place card is rather lovely. You can use any coloured or patterned paper and the printed name paper is tucked neatly in between. Image - Martha Stewart

Above - this rolled heart place card is really elegant. The strip of paper has the guest's name written on to it and it's then rolled into a quilled heart and is tucked over the glass. Image - Martha Stewart

Above - love these child-like felt heart place cards. Roughly cut and stitched together the the stitched name tags pinned on top. Again, any colour combinations would work here and don't have to stitch on the names if you're not that handy with needle and thread!  Image - Our Labor Of Love

Above - now DIY doesn't come much easier than this. Cut out a heart with pinking shears, print out names and then stick on top. Punch an hole, thread with ribbon and twine and tie around your napkins. Ta-dah!! Image - This Is Pretty

Sunday, 26 June 2011

I Love... Lace Wrapped Details

I do like lace - so delicate, so feminine and so perfect for weddings. Lace is a great addition to so many details and wrapping a length of lace around any number of things just looks fabulous. The light still filters through, it looks amazingly special and it's a super quick way of adding wow factor. Of course you can buy lace for the more every day items and perhaps hunt out some vintage lace for the extra special details. How about using lace from your Mum's wedding dress to wrap around your bouquet?

So before you start getting carried away, measure your lace carefully before you cut (especially if it's vintage!) and remember that a few dots of double sided tape will keep things in place without icky glue oozing through the fabric. But here's a few ideas for you so you can love the lace too...

Above - so simple and so effective - candle holders with a lace wrap around them look really rather magical, delicate and that bit more special than plain old glass. Image - Davis Photographers

Above - a wrap of lace around plain stationery again takes it to another level and is a brilliant idea if you're printing your own invitations. A fab shortcut to easy, effective and economical gorgeousness. Image - Invitation House

Above - a tiny wrap of lace around the stem of a buttonhole looks fab and would mirror a lace wrapped bouquet perfectly. This is also a great look for girlie corsages too. Image - Jackie Wonders

Above - now I'm not totally sure if I like this lace wrapped tree but I wanted to include it to show there's really no limit of what you can wrap if you open your mind! Image - Jose Villa

Above - love these centrepieces with the lace wrapped containers. Such a cool way to improve the simplest (and cheapest!) holders and turn them into something rather amazing. Image - Jose Villa

Above - a wrap of lace around napkins looks amazing but here's a thing - these wraps aren't lace. Oh no, they're lace look print outs so even cheaper and even easier to co-ordinate as you can alter the colours to suit your scheme. Image - Martha Stewart

Above - a length of lace stuck across a simple favour looks brilliant here and it's going to be a more cost effective way of adding oomph to plain favors than other impressive packaging ideas.  Image - Martha Stewart

Above - I love this and just wanted to show you that lace wraps look great around almost anything, from bottles to tin cans. Lace really is fab. Image - The Nichols Studio

Sunday, 12 June 2011

A Rainy Sunday Update...

So, the last few weeks have been so busy, I barely feel like I've had time to catch my breath but today, a cancelled school summer picnic and a day of rain and very unseasonal weather has given me a little bit of unexpected time and it feels like such a treat so I think it's time for another of my little updates.

The first bit of big news (that I can share at this stage anyway!) is that later this month I'm going to be launched a new venture. After lots of requests from brides and private clients, I'm going to be styling and designing weddings and events. I am so terrifically excited about this I can't explain! It's always been my favourite part of working on weddings - taking ideas and bringing them to life and then that totally magical moment when the bride sees everything set up absolutely takes my breath away. Someone asked me last night why I do what I do and my answer is simply that I love making people happy. So if you want something fabulous and totally 'you' for your wedding, do let me know because I would love to help.  

The new website for this is coming soon and I'm going to integrate the blog into it. I still can't believe how many of you read my ramblings and posts every day and it's great so thank you. The website will also be full of lots of amazing images from a big shoot I did last week. The ever gorgeous Claire from Brown Box Photography was behind the lens and we had the run of a great barn. I had planned lots of different looks - literary, vintage travel, herb garden, gyspy, pretty pink and tea & cricket - and had sourced or made and designed everything. The shoot was fab, the shots are amazing and I can't wait for you to see them all. All those ideas in my head translated perfectly and I'm thrilled with the results. Big love to Claire (and to Julie Tooby for her assistance too because she was just great). I even got to put on a wedding dress for some of the shots but luckily for you all, I've kept my face hidden!


There are so many more photos to share but I'm going to wait until the new website is up and running and of course, I'll announce all the details here and on Twitter first so if you're not following me, now's the time! - you can find me as @tamrynkirby

More news - I'm working with frankly one of the most amazing venues in Berkshire at the moment to put together what will be a wonderful wedding event in October. Again, more news here & on Twitter as soon as it's ready to launch and there's lots of exciting surprises coming then. Honestly, it's going to be fabulous and I get all smiley and excited just thinking about it!

There's so much more to tell you but I'm worried I could end up writing a novel of a blog post so I'll keep it short for now but thank you to everyone for support & help recently. I've also met some really lovely 'new' people in the last month or so (you know who you are!) and thank you all for being another part of the answer to the 'why do you do what you do' question - because as much as I love making people happy, there are lots of people that make me happy too and right now, because of you all, clients & industry friends, I'm just about as happy as can be.


Saturday, 11 June 2011

In The Mood - Lollipop Inspiration

Saturdays in my house quite often mean one thing - a trip to the sweet shop. Armed with a little bit of money, my son and I head to the village shop where they still, happily, have a little penny sweet bar by the counter. As well as the inevitable pink shrimps, white mice and cola bottles, my son will inevitably pick lollipops for both of us and we wander home through the fields watching the birds swooping & the corn growing with our strawberries & cream, apple, banana or cocoa vanilla flavour lollipops for company.

So today's post is inspired by our weekend ritual and it's all about lollipop inspiration - fun, bright and nothing too serious. We've all still got a bit of the big kid inside us and if you can't indulge that on your wedding day, when can you?!

Above - sweet little 'going home' lollipop gifts for guests would certainly make you smile on the drive home! It's easy to print those tags yourself then just attach to the lolly sticks and set out at the end of the evening. Image - Good Wedding Invitation

Above - there's just something about these garlands that makes me smile! Lots of fabulously coloured lollies tied onto coloured strings, dangling happily, I love it! Perfect as 'pick your own' favours for guests or you could add little tags so they double up as seating cards. Image - Home Confetti

Above - I chose this image to show that lollipop inspiration doesn't need to be all big swirls and it doesn't need to be a theme of its own either. You can integrate a little lolly love into your wedding in a more subtle way as these butterfly shaped clear lollies show. Image - It's A Jaime Thing

Above - lolly additions to a cake! To me, this looks a bit like something out of Hansel and Gretel (now there's a wedding theme I'd like to work on!) but the lollies certainly add some bright pops of colour and texture to this. Image - Love Me Do

Above - now I love this idea, it's a great way to give lollipops as favours but avoid the crazy colours if you don't want them. Here, the lollipop tops are wrapped in neat squares of wrapping paper and tied with ribbon. You can find templates on line for this project if you want to copy it exactly or you can play about with your own shapes and ideas. Just punch a hole in the paper to pop the stick through and then fold around the lollipop until you're happy! Image - Martha Stewart

Above - Now this I love! Lollipops used as stirrers that also add some fun and flavour to the drinks in question! Easy, effective, cheap and a definite conversation starter. Image - Real Simple

Above - I have a thing about red & white weddings so this image appealed straight away! This is a great 'prepare ahead' table centre which is great if you're a DIY bride. White enamel bucket, sand in the bottom to weight the bucket down and to hold those lollipops in place. Ta-da, centrepiece in minutes. Image - Real Simple

Above - seating cards that guests will definitely want to pick up! These super bright and happy lollipops and their tags around the lolly sticks and are stood in a sea of jelly beans. You probably need a styrofoam base to stick the sticks into and then cover this with jelly beans - the ribbon here covers up anything you don't want guests to see! Image - The Knot

Above - a cute bout! Love this mini lollipop buttonhole and it's another easily achievable piece of wedding DIY. Trim the stick if it's too long, glue onto some ribbon and attach a pin the the back of the ribbon so it can to pinned to the lucky chap in question. Image - via WeddingBee

Above - a lollipop bouquet! Really, does it get much sweeter than this?! Again, this would be something you could make yourself - just sit and play around with the grouping of those goodies until you're happy then secure with tape and cover with ribbon. Image - WeddingBee

Wednesday, 8 June 2011

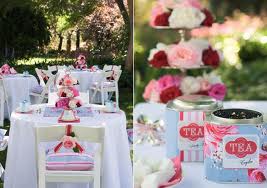
Delicious Details - Vintage Tea Tin Centrepieces

I am such a tea lover, it's untrue. I can barely function in the morning until I've had my cup of tea and there's something so comforting about wrapping your hands around a big mug and just sitting and sipping for a few minutes. Now I'm usually a lazy tea-maker - tea bags might not be the best but they're quick for a girl on the go. However, when I've got the time, I like to make proper tea, leaf tea, and the gorgeous smell when I open my tea tin to scoop out a big spoonful into the pot is just heavenly.

But the tea tins themselves can be just as gorgeous in a more visual way - I love the patterns, the printing, the gorgeous colours of tins of tea. They're special versions of the everyday which is just what I like for weddings so here are some ideas for turning tea tins into gorgeous centerpieces...

Above - love these candles in the old tins. You could do this one of three ways - either just pop in a small pillar candle, fill the empty tins with wax and a wick or, if they're water tight, add some water & use a floating candles instead. Image - Intimate Weddings

Above - pretty pretty pastels. I love these pale blue tin with the delicate pink roses as they co-ordinate beautifully. If you can't find tins that 'go' with the flowers you want, you can always download & print tea label wraps to re-cover the tin. Image - Yvette Inufio

Above - another beautifully co-ordinating display, here with much punchier colours and those tins look great. Another perfect addition to the tablescape is the glass full of vintage spoons. Image - Lovely Velo

Above - this is such an interesting table top with the mix of tin shapes & sizes and the variety of blooms in them. Such an eclectic look that's bought together by the use of those gorgeous tins. Image - Martha Stewart

Above - I love this wild look and here's a tip for getting a little more height from your tin centrepieces - just stack them up to create and more interesting variety of heights. Image - Milk Glass Village Rentals

Above - now this is a really well co-ordinated look but the white chairs and table linens stop it from looking too over-worked. The tins have been wrapped with paper (use wallpaper, wrapping paper or scrapbooking paper) and the 'tea' labels printed and added afterwards. If you want 'the look' to fit perfectly, then personalising the tins like this is ideal. Image - The Sweetest Occasion

Above - this would be a pretty set up for a guest book table with the books, the vintage typewriter and the tin holding the flowers. You could use a similar look for a dessert table or seating card display. Image - Yvette Inufio

Saturday, 4 June 2011

In The Mood - Paper Plane Inspiration

Today's post is inspired by this week's trip to The Imperial War Musuem at Duxford (if you've not been - go! It's a great collection, lots to see and do and the cake there is really excellent!). Anyway, son is prepping for a  school project so this entitled him to a little time in the gift shop and we came away with possibly the best paper plane kit ever. Needless to say, our house is now full of planes and my head is now full of paper plan ideas.

I'm loving vintage travel as a theme anyway and the addition of some quirky little paper plane details brings a little bit of fun to the overall design of the day. We can all make paper planes so they're perfect for a spot of flying DIY and as most use need some paper, they're relatively cheap and you can make them in any colours you like. So let paper planes inspire you and let your imagination fly...

 Above - two things to love here. I love how the bride's shoes have been lined with vintage maps and the tiny little paper planes on wires make great decorations for a guest book table as they 'fly' from behind the sign. You could also imagine these taking off from a table centre or how about tiny versions jetting out of the groom's buttonhole? Image - Caroline Tran

 Above - I love these air mail invitations, the layouts, the colours and the beautiful old fashioned air mail envelope too. These would give your guests a real hint to the theme of the day. Image - Custom Paper Works

 Above - beautiful paper plane mobiles here, looking totally gorgeous decorating trees here but they'd work equally well hanging from a marquee ceiling. What I like best here is that the planes are made from vintage maps. Now I can't stand to cut old maps up but you can get map style wrapping or scrapbook paper so no real maps need to be harmed! The addition of the ribbons here just bring a softer touch to this display.  Image - via Ruffled

Above - now I really REALLY love these save the date notes. I have such a 'thing' for the aqua and blue colour scheme, the stripy envelope lining is just gorgeous and the plane notes are fabulous. Lay them flat to send and let guests have some fun folding and flying when they arrive. Image - Martha Stewart

 Above - these seating cards are brilliant. Mini paper planes with each guest's name on the wing with the seating assignment folded away inside. Use these at your wedding and I can imagine that you'll be bombarded with little planes when you make your entrance into dinner - lots of fun! Image - Mimi + Karl

Above - leading on the from the paper plane ideas, you can take things further with your guest book and use a passport style book, complete with stamps, for guests to leave their notes in. I really like this idea (and you could use the same stamps to decorate place cards, seating cards, menus and ceremony programs too. Image - Stacy Able

Above  ok, so these planes might not be paper but I couldn't leave them out! Little balsa wood fliers have the couple's 'logo' on one wing and the seating details on the other. I love the crazy landing field display and again, guests could have lots of fun with their seating cards (which isn't something you say very often!) - Image - The Knot

Above - more beautiful stationery with a paper plane them. Plain planes, map planes and I really love the compass style invitation card. Really simple to make yourself with some card, a printer or stamps and some wood (or card) compass points. It would be fun to include your venue details as a grid reference too! Image - Wedding Talk

Wednesday, 1 June 2011

Delicious Details - Soda Bars & Bottles

I love drinks in 'proper' glass bottles - I know it's an indulgence and it's not for every day but they just look so pretty, so cute and so much fun too. And when there are gorgeously coloured drinks inside them that's even better. So, today's post is all about fabulous soda bars and soda bottles...

I love soda bars, they might be my new favourite thing - so easy to set up, cheaper than providing lots of alcohol (so great if you've got a long day planned!) and they're just such a talking point. And, in a world of throw away plastic, there's something really rather special about good old fashioned glass bottles. That 'every day item, elevated' idea is just something I love - take one item and make it the best it can be. So next time you're in the supermarket, check out the range of drinks in glass bottles and get thinking about all the good things you can do with soda bars and bottles...

Above - love this pretty soda bar with the gorgeous ruffled backdrop and the plain butchers block style bar. Those big galvanised buckets of ice are a great idea too and I love the spectrum arrangement of the bottles. Great styling. Image - Christie Pham

Above - these bottles have letters on the top - a great place to pop some stickers with your new initials, a monogram or wedding date. Image - Elizabeth Anne Designs

Above - the simplest soda bar is also on of the most effective! Big bucket, ice & bottles - simple. Just remember to have some bottle openers to hand and how about some fab striped paper straws too? Image - Intimate Weddings

Above - here the soda bottles are used as seating cards & favours and what a great idea as guests have their drinks as soon as they sit down! All you have to do it slip a tag around the neck of the bottle with the seating details on and you're done. How simple is that?! It would still be a nice touch to have glasses and a maybe ice on hand for guests who don't want to drink direct from the bottle. Image - Lotus Institutions

Above - another rustic soda bar, this time with a plain wood table & background. Love the colours of those drinks and the raised floral arrangements & sign add some variation in height to what would otherwise have been a very 'one height' display. The flowers soften the wood and those bright angular bottles too and the whole thing works perfectly.  Image - This Modern Romance

Above - lots of my favourite things in one set of image. The bottles, the stripy straws, the bold sign and the quirky container. What a great soda bar display with perfect finishing touches. Image - The White Library

Above - another soda seating arrangement and I so like this idea especially with the cute chalkboard and those bold, block print, tags. I'm just hoping there are bottle openers on the tables! You could find some interesting way to display these bottles rather than just lining them up on a table - how about a wine rack or some shelves? Let your imagination out to play! Image - Wedding By Color

Tuesday, 17 May 2011

I Love... Brown Paper Bags

If you've been reading this blog for a while, you'll know, I'm sure, about my love of wedding DIY and my total fixation with using simple things to create special things. And let's face it, things don't come much simpler than the humble brown paper bag. Cheap to buy in bulk and easy to adapt, these little beauties are just perfect for weddings.

They make great lanterns, favour bags, menus, decorations and you can even put your table centres in big ones - just hide a vase inside and you're done! Brown bag details work particularly well in rustic, country styled days but depending on where & when you're planning on using them, they can be just as perfect for other events too. All you need to do is get a little crafty...

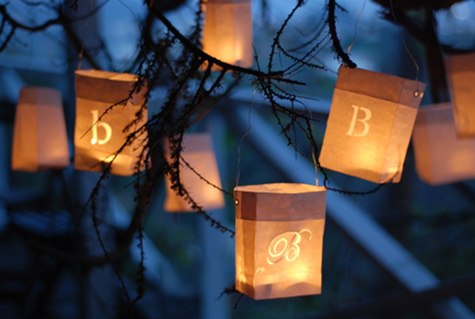
Above - love these brown bag lanterns. Easy to make - take two brown bags, cut your design into one and then pop the other bag inside so that when you put the light inside, you get the effect above. The thicker 'double bag' means that you can attached the wires to the top to hang your bag lanterns wherever you wish! Image - Design Sponge

Above - how cute are these ceremony programs? The couple's details are on one side and the running order of the day is on the other. You could put anything you want in the bag - how about confetti or a little ribbon streamer for post-ceremony celebrations? Image - Elizabeth Anne Designs

Above - a fab stationery set, all inside a brown paper bag. Love the pink hues on this design as well, they work so perfectly with the browns and creams and I love the idea of guests opening a little goodie bag to find their invitation, how special would you feel? Great if you're including more information with your invitation too as everything can be kept in the bag so (fingers crossed!) losses are limited! Image - Liz Banfield

Above - this is such a great visual - the brown bags against the monochrome background, just so striking. The 'thank you' is stamped onto the bags, the favours popped inside and then the bag is sealed with a black & white pin badge or over-sized brad. How great to see this all lined up for guests to take at the end of the evening? Image - Lovely Little Parties

Above - Another look I really love, especially with those big bold buttons holding the bag shut. Here, the bags are rolled shut once the favour, confetti or other surprise is inside then the printed strip is attached and the button goes over the top. I'm now thinking you could pop nibbles in those bags for an excellent DIY canape option during post ceremony drinks... Image - via Lulus Inspirations

Above - ahhh, doilies, how I love the. Here, this gorgeous lace look is created simply by gluing doilies to the inside of the bags and then popping a light inside. The bags are then arranged on the table to cast a really beautiful glow over the area. Image - Martha Stewart

Above - the bag lantern has long been a favourite for creating lit pathways at weddings and, having set up quite a few in my time, my tips would be to weigh the bags down with a couple of hefty pebbles (sand is too moist and makes the bags soggy!) and use battery powered tealights. If you can put a couple in each bag, they cast a much better light. Image - My Kate Parker Wedding

Above - such a simple but effective idea for a seating card/favour combination. The bag just have the guest's names written on in coloured ink and their seating assignments are below. You're guaranteed your guests will pick up these bags! Image - The Sweetest Occasion

Above - love love LOVE this! These simple little brown bags are doubling as favour bag and menu card, how wonderful. They they're just closed with a peg and laid on each place setting. Works so well with this simple table setting and I think this is just great. Image - United With Love